
Ever since I built an AirGradient board back in 2023, I have been more and more conscientious about air quality. Pretty instantly after installing the board in my living room, I realised common habits like cooking can significantly increase the particulate levels in my entire apartment.
Here is a good example of a pretty large (and long-lasting) PM2.5 spike on September 23rd after cooking a meal1:
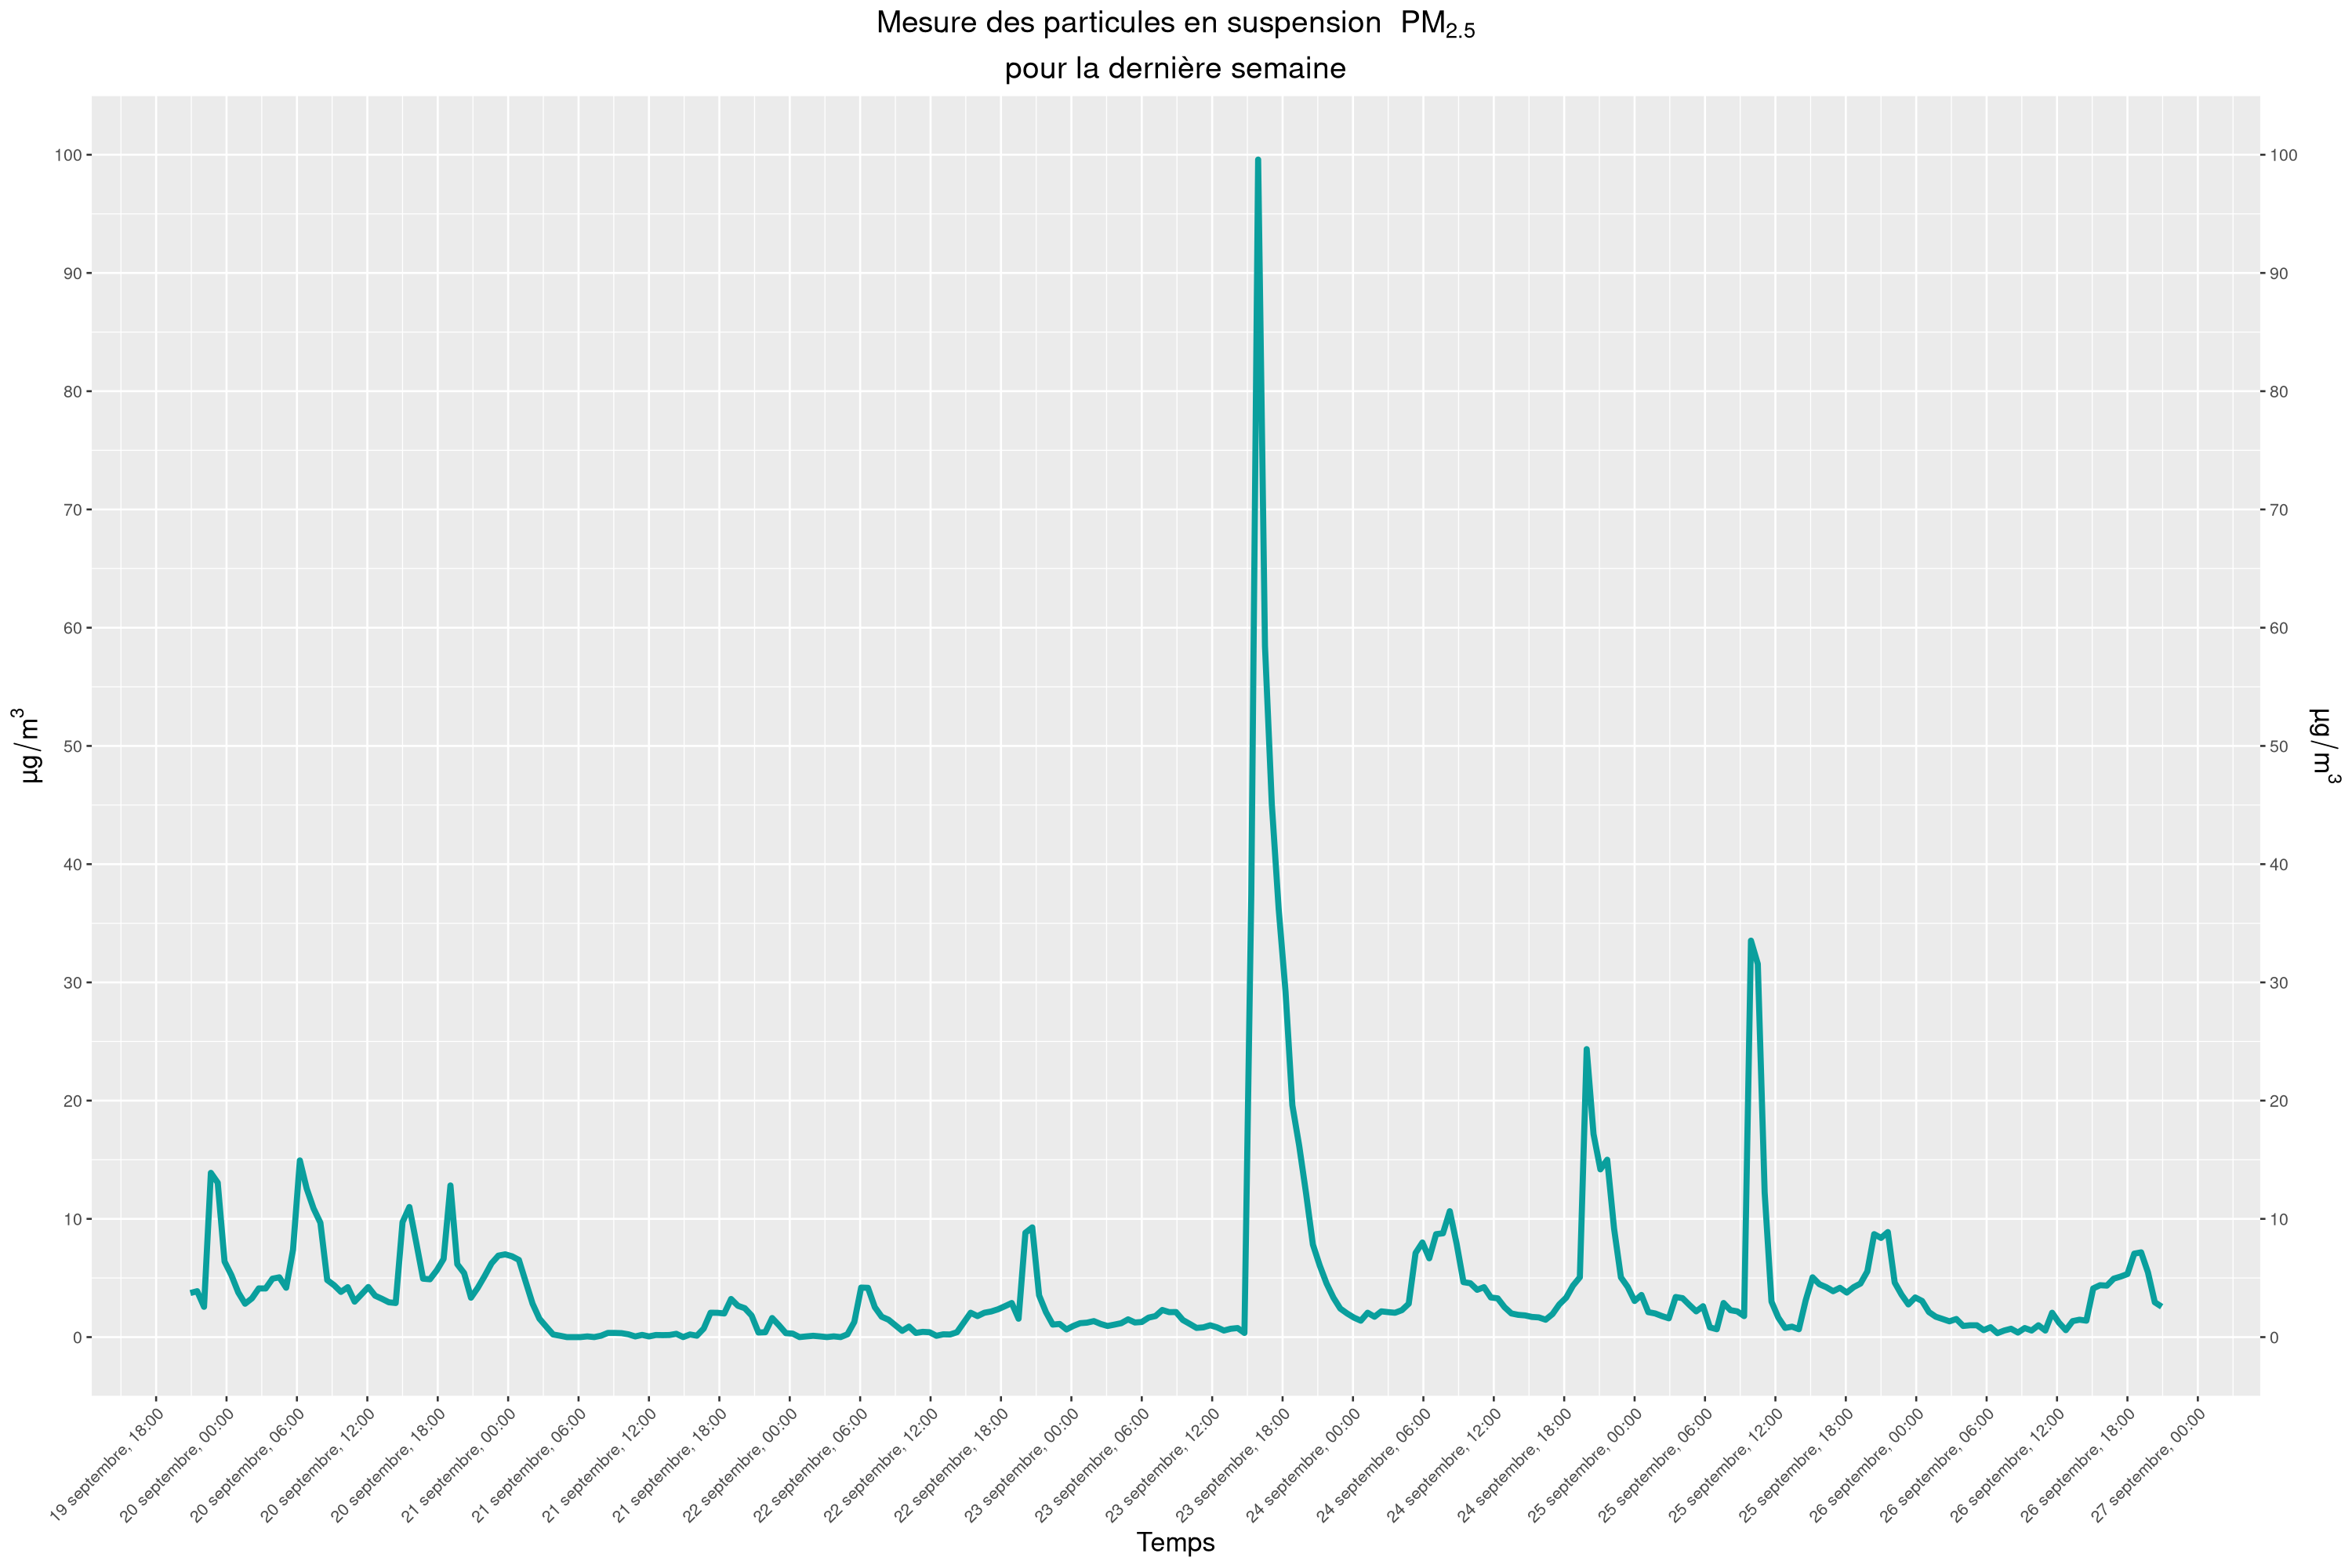
Isn't this crazy? Last time Montreal had such bad outdoor air quality, there were public broadcasts telling people not to go outside and to wear N95 face masks if we absolutely needed to. Inside my apartment though, no one ever told me cooking veggies in a little oil on medium-low2 could make the air I breathe unsafe.
This of course is aggravated by the fact my apartment is pretty much as airtight as it can reasonably be, since winters here are very cold and air infiltrations are a major heat loss source. As such "opening my windows when I cook" is not a viable solution to this problem half of the year.
I first tried solving this issue by tuning my HVAC system. Sadly, its controls don't offer much flexibility3, which means it is not the right tool to respond to short-lived spikes like these. Not only this, but the quality of the air outside is not always good either: Canada now has a forest fire season (we're all doomed) and my neighbors regularly smoke cigarettes right under my HVAC air intake4.
A box, but nicer-looking
Clearly, the solution to this particular issue was to buy an air purifier. Or at least, that's what a "normal" people would have done. Sadly, these units are expensive, use (expensive) proprietary filters, don't work very well and can be loud.
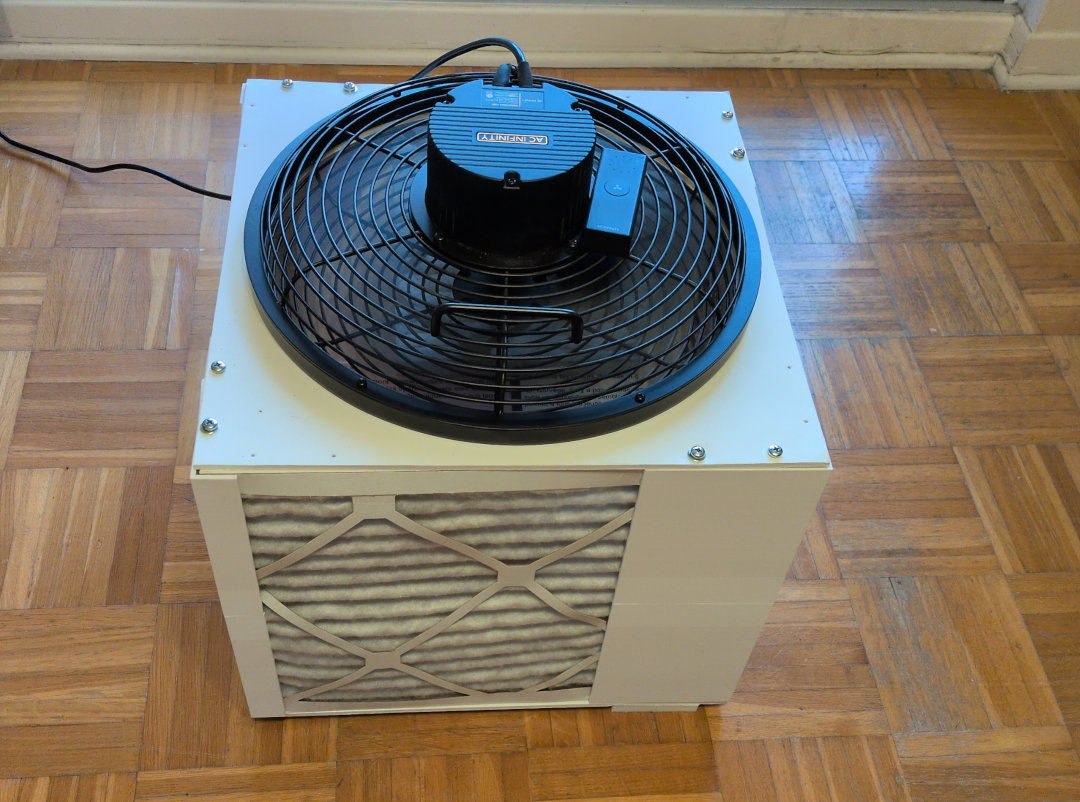
One of the great inventions of the COVID-19 pandemic is the Corsi-Rosenthal box. Popularised in 2020 by Richard Corsi and Jim Rosenthal, the idea is to make a DIY air purifier by using a large fan to force air through cheap and readily available MERV13 air filters.
The main downsides of regular CR boxes is they are pretty ugly, can be loud depending on the fan used and need to be rebuilt when the filters are changed (they are held using tape).
That's when I stumbled on this amazing design for a silent and sleek CR box sold by The 3D Handyman. Clearly, with a bit of tinkering and a 3D printer, I could also design something sleek, silent and efficient!
Since I was already using MERV13 air filters in my HVAC, I decided to design around 4 vertical "beams" where the filters would slot in. With tight enough tolerances, I figured I could get rid of the complex moving parts in The 3D Handyman's design. I also added M5 threads to screw the top and bottom panels and the TPU feet to elevate the box from the floor.
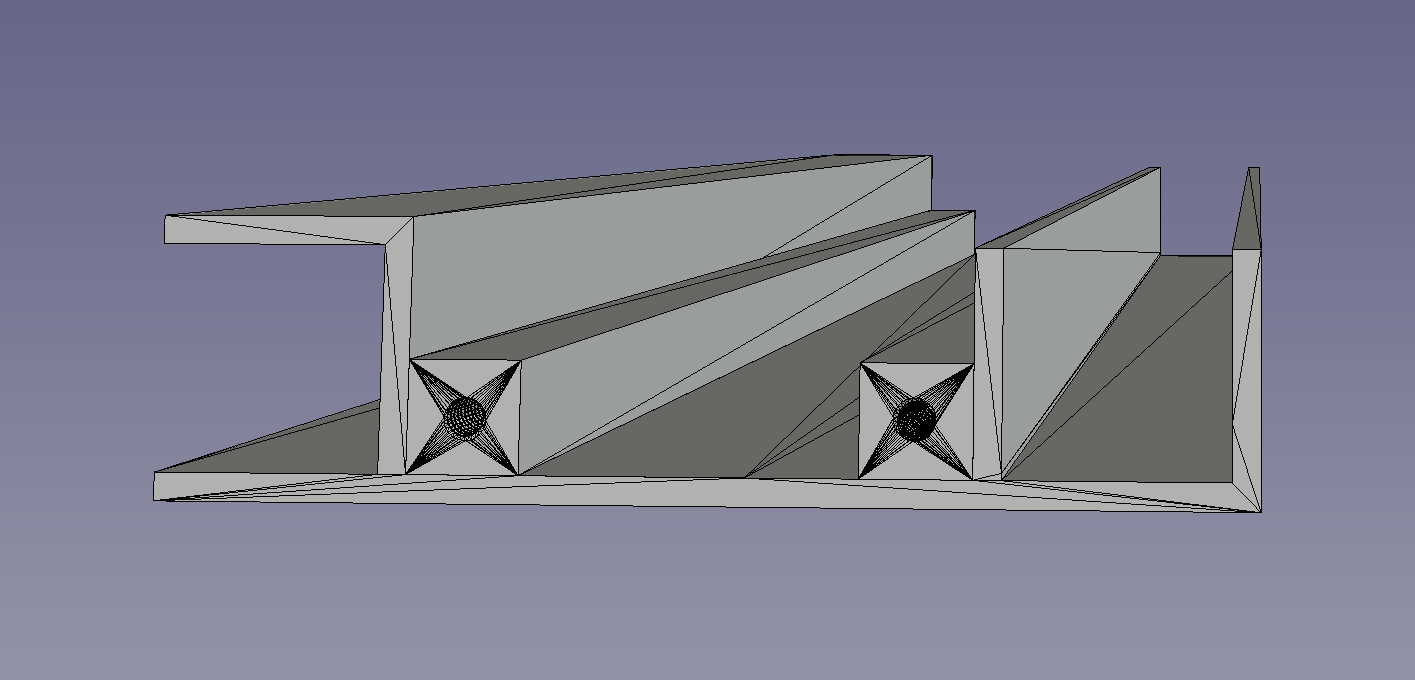
The final result looks like this. I used some foamcore boards I had laying around at work for the top and bottom panels, but any somewhat rigid plastic panels (like coroplast) would also work:
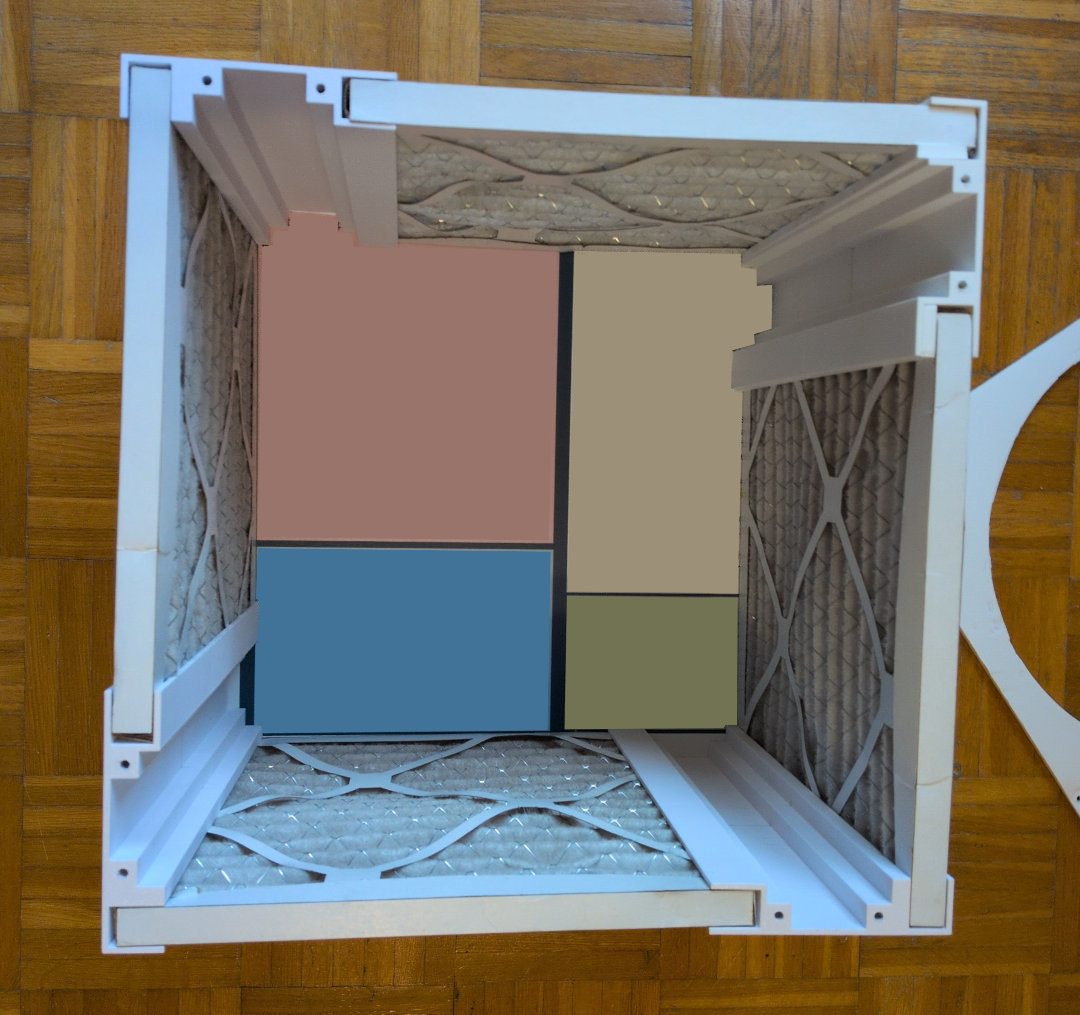
I ended up having to split the "beams" in two and joining them with dowels, as even the largest 3D printers I had access to couldn't print them in one piece.
Costs
Here's the cost breakdown for this project (shipping and taxes are included):
- AC Infinity Cloudlift S12 fan: 303.45 CAD
- 3D printed parts: 85.56 CAD
- Air filters: 101.79 CAD
- 16 x M5-16mm screws: 11.39 CAD
Total: 502.19 CAD
Yikes, expensive! But:
-
The fan is amazing. It is by far the best fan I have ever owned. Not only it is all metal and very quiet, but it is also PWM-controlled via a USB-C controller, which means the speed it runs at can be automated. I have been using it constantly and take it out of the CR box during the summer to be used as a "regular" fan. I like it so much so I am seriously considering buying the 14 inch model.
-
The 3D printed parts are plastic and they will last me a lifetime.
-
As mentioned before, the filters are the same I use in HVAC, which means I can buy them in packs of 12 to reduce costs.
All in all, I'm very happy with this project. Since finishing it, I have been able to consistently get the PM2.5 levels in my apartment down to zero and significantly reduce the time it takes to recover from a spike caused by cooking food.
I certainly could have cut the cost of this project in half by choosing a cheaper fan, like the box fans used in the reference Corsi-Rosenthal instructions, but I decided to spend more for a more quiet and reliable option.
3D files
Here are the STLs I used for this project. I certainly don't recommend just printing them as-is, since I am using the 12" x 12⅞" x ¾"5 custom air filters from my HVAC and you should probably use something more standard.
If you use these files as inspiration, your goal should be to make a box that is 16" wide, to fit the AC Infinity fan comfortably. I printed the "beams" in PETG at 100% infill and the feet in TPU 95:
Future
The next step in this project is to automate the fan speed based on the PM2.5 levels in my apartment. At the moment, I manage this manually and it is becoming a chore.
This should be relatively easy to do with a Raspberry Pi Pico board, since AC Infinity sells a USB-C to Molex adapter for the fan.
-
This was with my pretty good range hood running at a reasonable level. Without it, I've seen PM2.5 levels spike as much as 250 from cooking alone. ↩
-
To be clear, this spike was not the result of me burning the hell out of a piece of meat or something like that. ↩
-
The HVAC either runs in manual "low | high" mode, or on a timed "20min ON | 40min OFF" loop that can be tuned by fiddling with a hydrostat knob that triggers the "high" mode. This is pretty dumb and makes it so the HVAC runs even when the apartment is empty or doesn't run enough to keep CO2 levels low when multiple people are there. A future project of mine will be to hack the controls to tie them into my air quality monitoring and trigger the HVAC based on CO2 levels. ↩
-
I'm also working on another HVAC hack to fix this. ↩
-
Sold, of course, as as 1" thick filters... ↩